ALT//MIN was easily the most electrically complex thing I had built up to that point. Compared to my earlier projects, the sheer number of components, wires and power requirements made this a completely different kind of challenge.
Here’s a list of all the components and the required wires in the project to give an idea of the amount of moving parts which all had to be integrated:
- Four WS2812B 7 LED ring lights for the cubes. Each with a dedicated capacitor to smooth out voltage spikes.
- 16 wires with 4 capacitors.
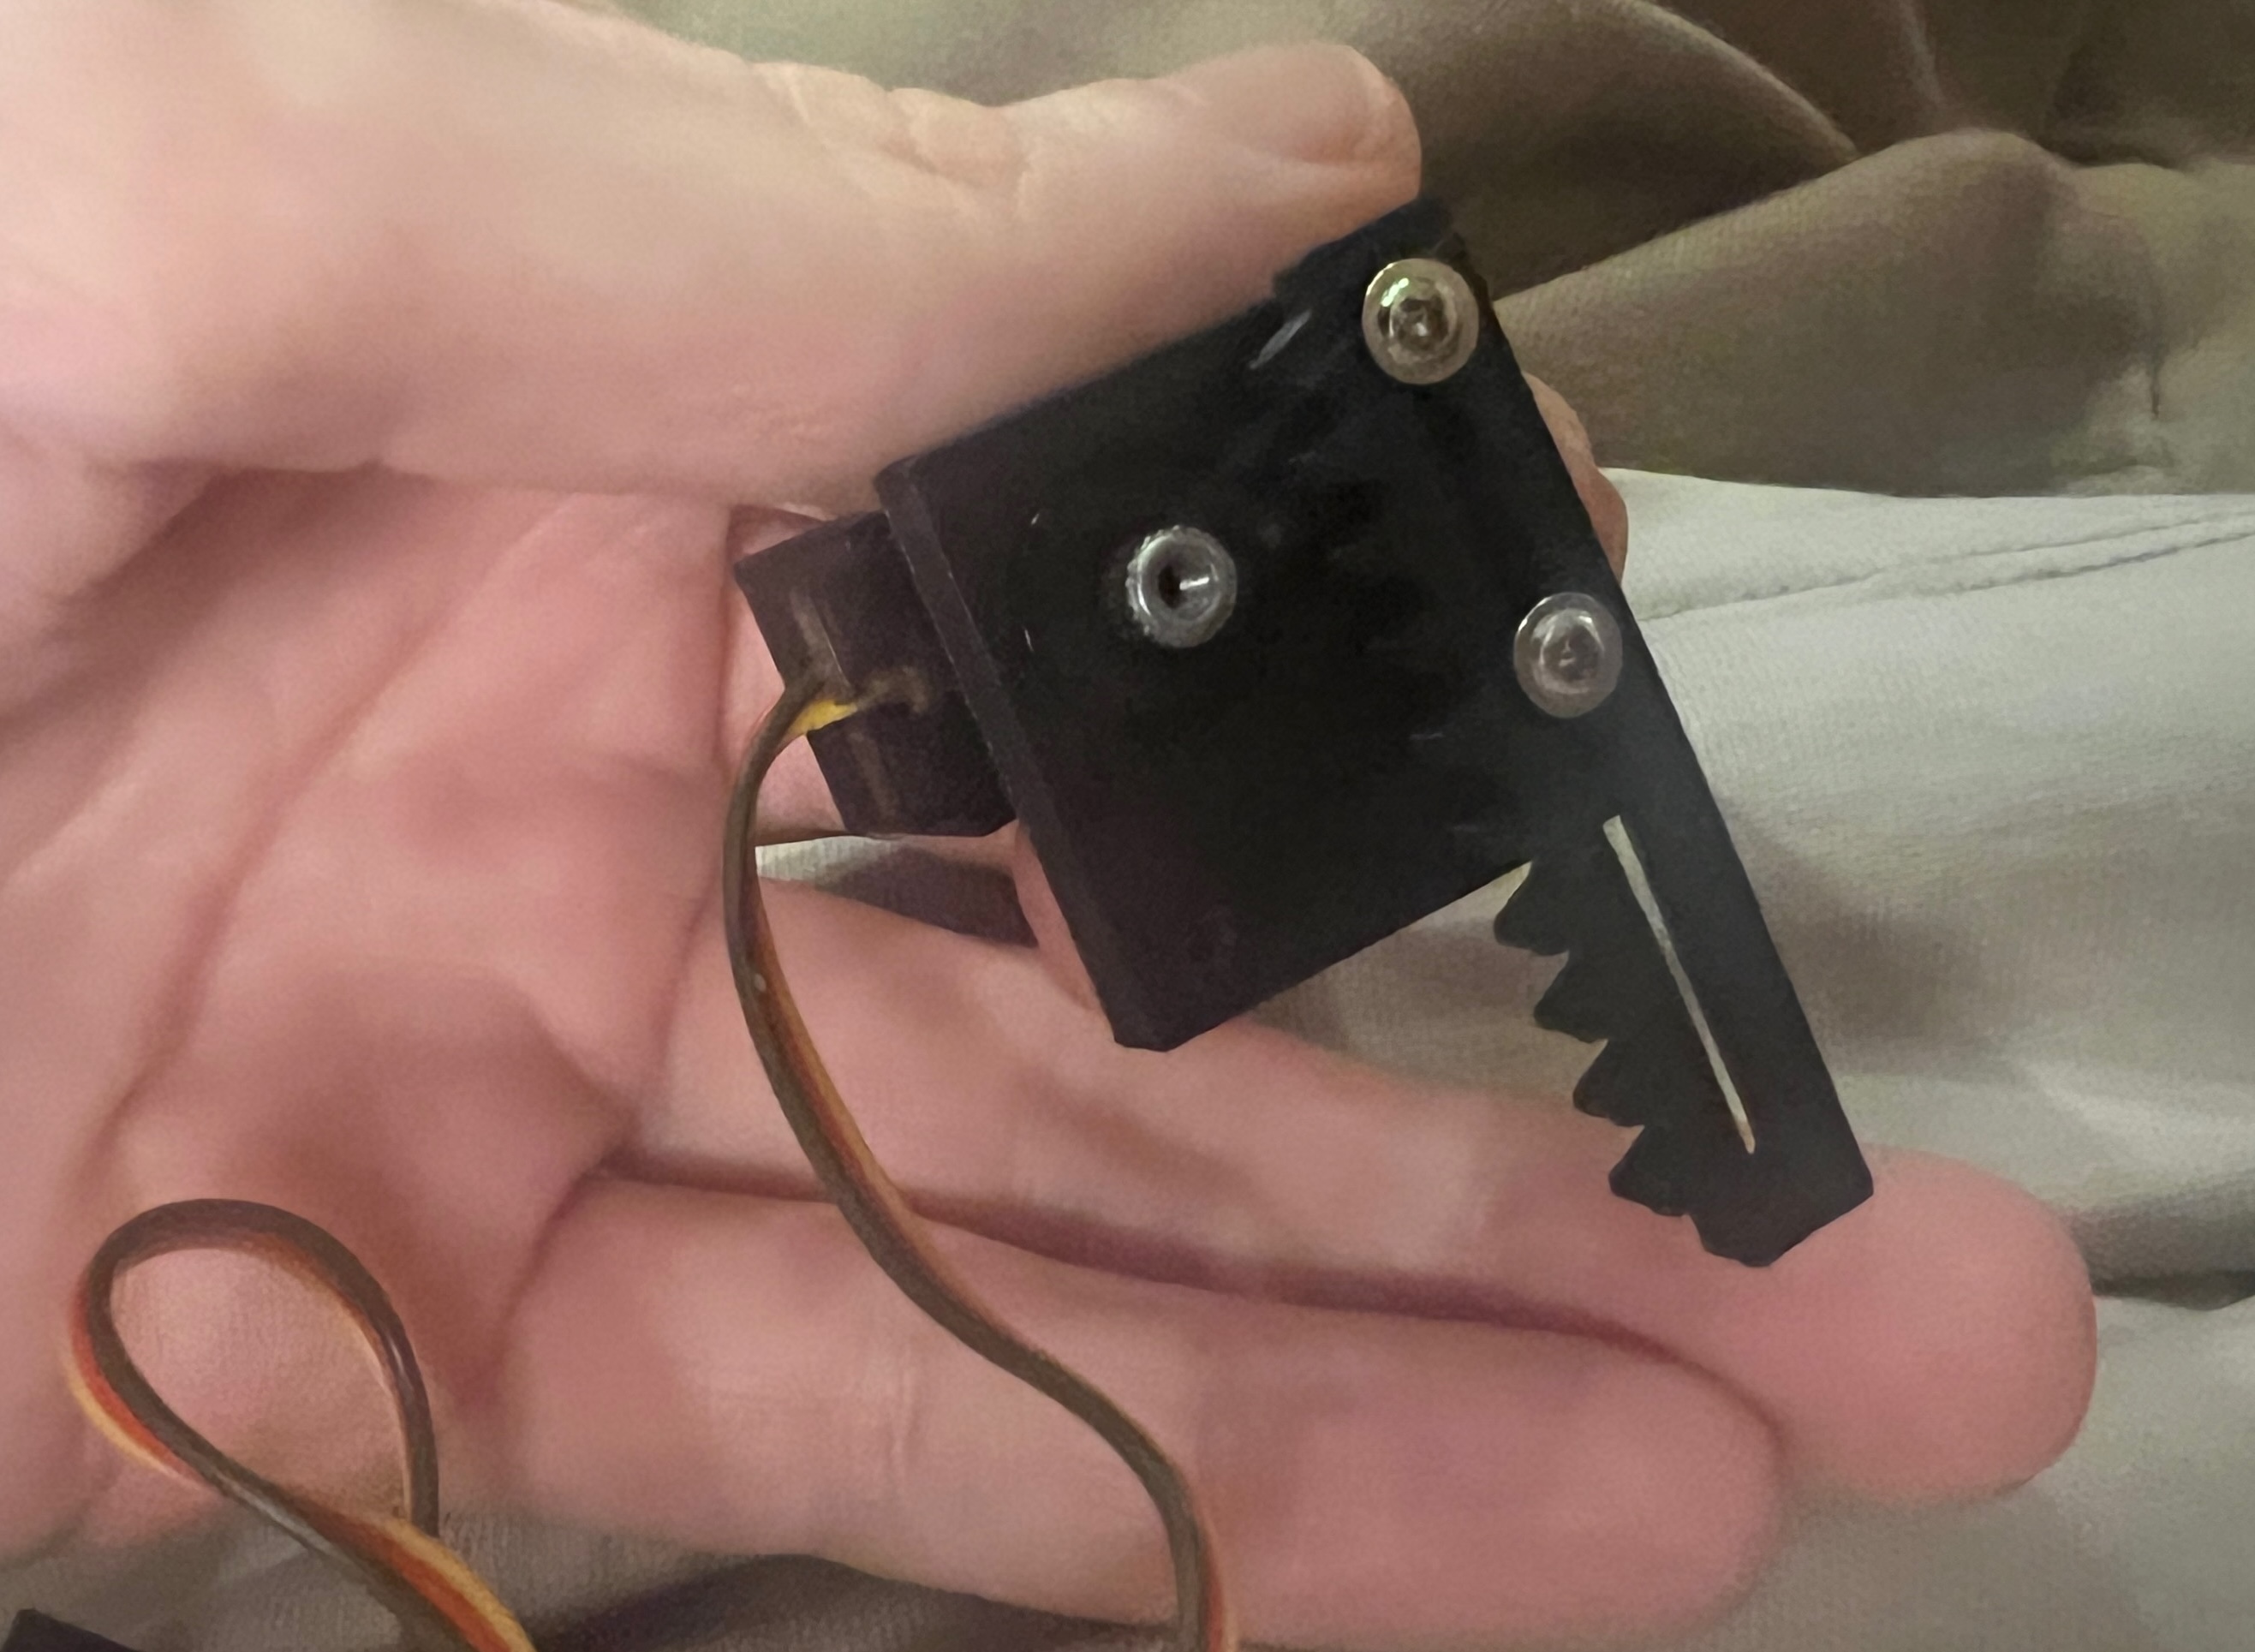
- Two servos for revealing the key and opening the final prize drawer.
- 9 wires.
- An OLED display.
- 4 wires.
- A button, a lock-and-key button and the main power switch.
- 6 wires.
It’s quite a lot and powering the whole thing… memorable…

From day one, I knew I wanted the puzzle to be battery powered. It provided an interesting challenge and opportunity to learn more but mostly, I thought it would just look fantastic as a standalone object.
I wasn’t naive, I knew it would be difficult but oh boy…
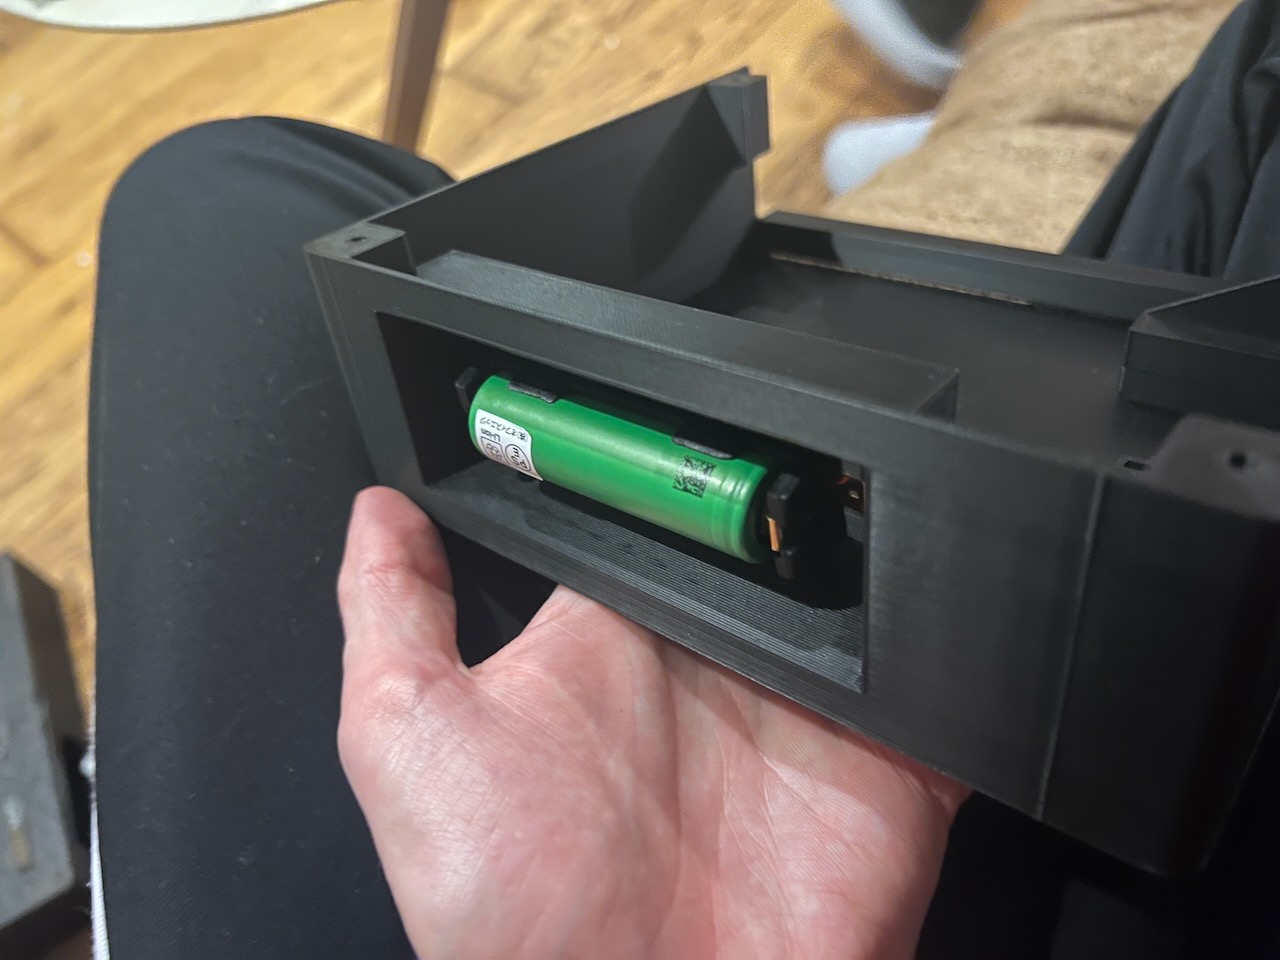
Previous projects I worked on were USB powered and I didn’t like the idea of a cable coming out of the side of ALT// MIN so I started researching how I was going to power all of these LEDs, motors and display off a single 18650 battery with decent battery life.
What’s The Setup?
Let’s have a look at what the power setup looks like for ALT// MIN:
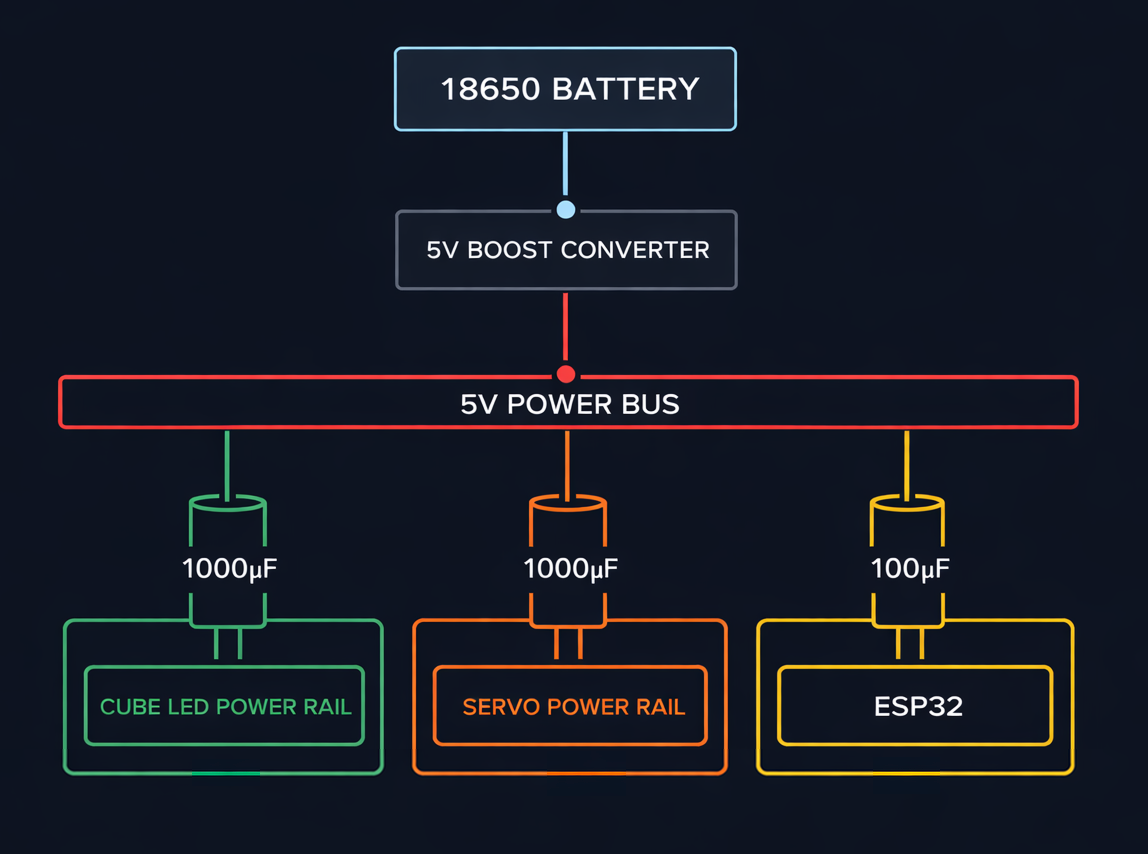
Essentially, the circuitry revolves around one main power bus which splits off into three for the LEDs, servos and a dedicated line for the ESP32.
The LEDs tend to run absolutely fine for a long time but, as predicted, the servos (for the key and prize reveals) do draw a lot of current in short bursts.
Even with electrolytic capacitors across all three branches, brownouts still occur once the battery drops to around 60% charge.
I had done my homework on this and didn’t expect the servos to keep working until very low battery life but I was dismayed at how quickly the system starts to fail to provide enough current for these motors without causing issues around the rest of the system. Particularly as everything else can run so much longer, even running just every LED at max brightness, the puzzle can run for hours on end.
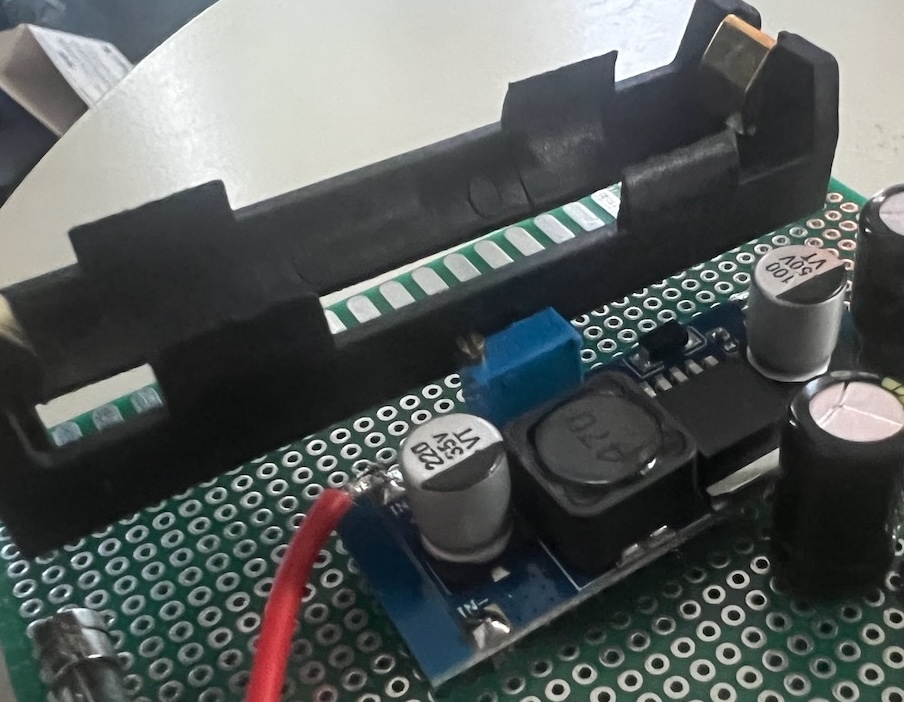
Boost Conversion
The boost converter appears to be the limiting factor here. As battery voltage drops, it has to work progressively harder to maintain a stable 5V output, and my XL6009 seems to struggle under the servo load spikes. It’s definitely a beefy component but I think it’s just not capable enough to give me reliable operation down to the lower levels of battery life I’d like.
There are some other converters out there which seem like they might be more fit for the job but unfortunately I couldn’t find them at any Japanese retailers.
Additionally, a superior boost converter might have improved things a bit but ultimately, no battery lasts forever and I’m not sure it matters if it lasts another couple of playthroughs or not.
Remembering The Spec
Again on battery and power draw… it’s easy to get obsessed with rinsing out every last drop of the battery but ultimately, when I think back to what the actual spec was:
An interesting method to deliver simple Christmas gifts to my nephews and niece.
That requires just one playthrough and it more than meets that requirement whilst gaining, in my opinion, a stronger aesthetic by keeping the visible single-battery design. I originally tried to mount the battery within the box but then realised it actually looks pretty awesome and fits my aesthetic well when it’s visible on the outside. It also makes battery replacement simpler.
How Does It Actually Perform?
Actually better than one might think! Players tend to take between 20 and 30 minutes to finish the puzzle and, through my testing, the setup allows around 10 playthroughs before the servo movements start to make the puzzle reset when they happen.
If that does happen during use, I’ve programmed in state restoration code so players don’t have to restart from the beginning. Also, I can just keep a mental note of how many playthroughs we’ve had and carry a spare battery to replace it when I think it might start becoming an issue.
I’m considering building in a battery level indicator which would help with this stuff but that’s a nice-to-have I don’t want to dedicate too much time to right now.
Organisation
One of the toughest challenges was simply organising the internal power wiring…
Power wiring is probably the number one debugging area I hit against when solving brownouts and inconsistent behaviours. Dodgy solder joints are hard to notice and even when issues are pinpointed (typically using a multimeter), just re-soldering and moving around wires around is a real pain.
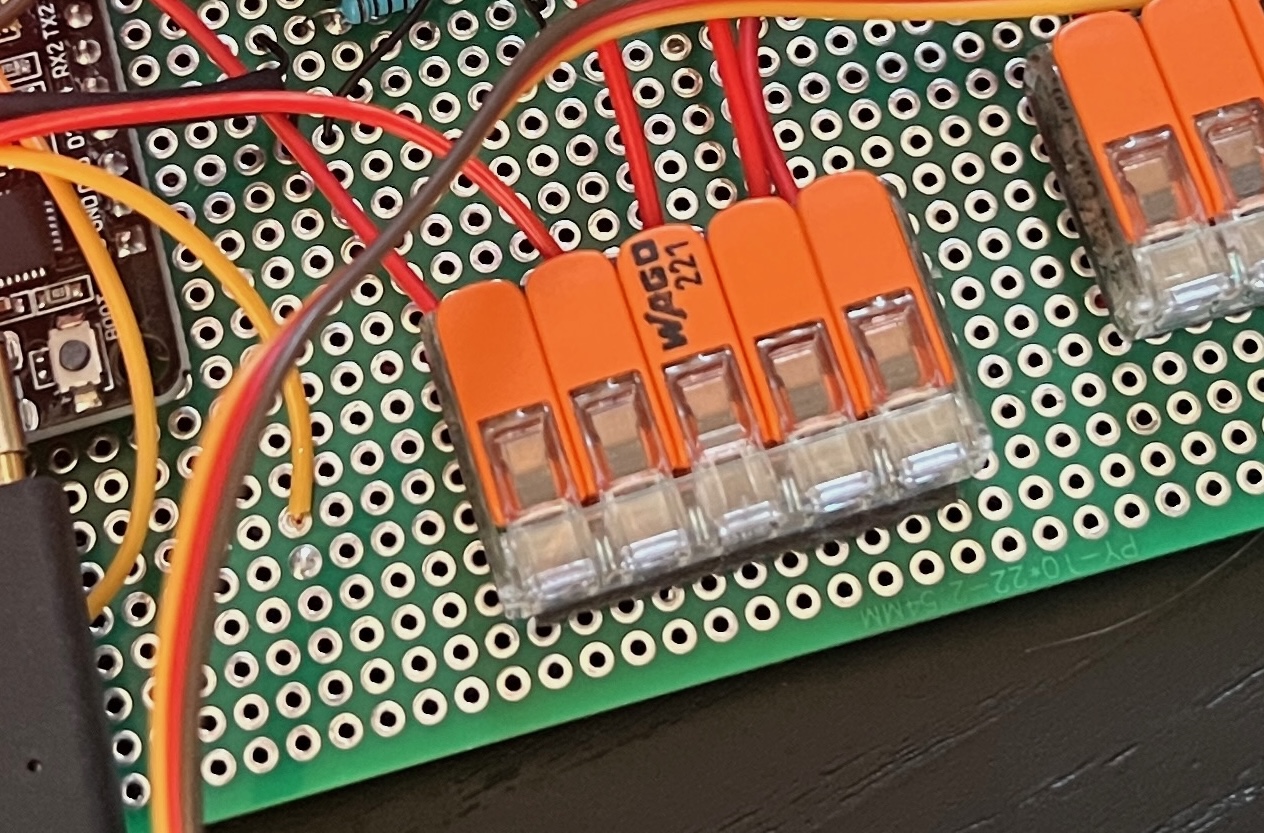
To that end, I cannot recommend enough these wago connectors. Buses which use clips to snap wires into place and hold them secure. No soldering at all is required so it’s easy to be confident connections are secure and even easier to move things around without any need to break out the soldering iron.
I also considered, once or twice, designing and printing a custom PCB board to elimiate the underside’s wiring but that felt like too much of a distraction at the time and actually, ALT// MIN requires a bunch of wiring for all the physical components it has.
Tips on Architecting Battery-Powered Solutions
To finish this section, I’d like to provide some tips for anybody else entering this world of hardware engineering. Those who aren’t might also find it interesting to learn about the kind of things one should keep in mind when coming into this stuff as a beginner:
- Test on battery power often. It’s inconvenient but it’s always better to discover problems sooner rather than later. You’ll spend most of your time on USB power as you iterate through code but do take a moment every so often to test under real world conditions.
- When shopping for components, go overboard. Use thicker wiring for your power solution than you think you need, buy batteries from known companies with high current ratings, high-quality capacitors and boost/buck converters. Again on debugging, when you have hardware issues, the first step is to find at which point of the circuit things are going wrong. That can be difficult so limit the amount of points of possible error based on low quality or underpowered components.
- Play it safe. Use fuses, battery management systems for long-running projects… These things can be dangerous.
Summary
Power management ended up being one of the most frustrating parts of the entire build, but also one of the areas where I learned the most.